LET'S GET STARTED

Stelzer Painting offers 100% FREE ESTIMATES. Contact us today to see just how affordable your next painting project can be!

REQUEST A QUOTE

Frequently Asked Questions

I understand that information about painting can be difficult to find, understand, and even conflicting at time. That’s where I come in! I’ve gained a wealth of knowledge throughout my 25+ year painting career – and I’m here to share it with you. Whether you’re starting a personal paint project, DIY, or even looking to get a second opinion on advice you’ve received from another painter, I can answer your questions and get you pointed in the right direction. Below are some questions I’ve received for specific projects from clients. Hopefully you’ll be able to use some of this information too. Got a question? Write me at info@paintcontractorportland.com or fill out our contact form.

Happy Painting!
Troy Stevens (owner)

  • Painting Over Varnished Stain

    Painting Over Varnished Stain

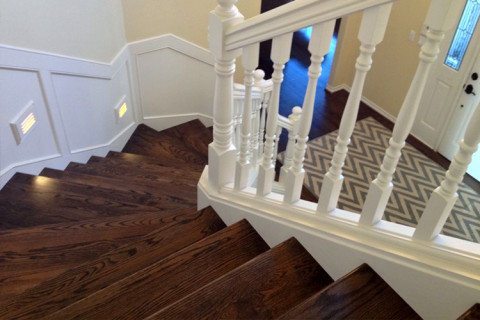
    QUESTION: I have an old home with lots of stained oak trim and stairs. I want to paint it, but I want it done well. I believe it has a varnished finish. What is the best method of preparing the surface, and what primer and finished paint do you recommend?

    ANSWER: Hi John.  There are several methods you could use to prepare the surface, but the easiest one would be to use a liquid sanding de-glosser, which eliminates the need for sanding the varnished wood before priming. These are solvents which are just strong enough to remove the existing varnish in order to give it sufficient adhesion for primer.  Although you’ll want to follow the directions on the container specifically, most will advise you to wipe the de-glosser on the wood with a rag or sponge, then wipe off any excess which doesn’t penetrate after a short period of time.  Personally, I like to apply this with the thin, really flexible sanding sponges, (use the spongy side).  A rag tends to splatter too much. I often use this de-glosser carried by Sherwin Williams.

    After the de-glosser has removed the sheen, wipe all the woodwork down with a lint-free cloth, or pick up some tack cloths at a paint or hardware store, (tack cloths are used for removing dust from a surface before applying primer or paint).  As far as the primer, I’d go with this high-quality water-based primer sold at Sherwin Williams, (assuming you might go there anyways for the de-glosser).

    Make sure and follow the directions on the can and always apply 2 coats to raw wood.  Since you’re using a water-based primer, you need to make sure you block in the tannins, (which are those little brown oils in wood that tend to seep out over time, especially when the wood isn’t sealed properly).  Since the tannins are sealed in between the 1st & 2nd coat of primer, it’s important to prime 2 coats.

    Now that you have white primed woodwork, you’ll see all the little gouges, imperfections, nail holes and seams.  Caulk the seams and spackle the rest.  After 24-48 hours, (depending upon heat & humidity), you’ll be able to sand your woodwork smooth with sanding sponges, then use your lint-free cloth or tack cloth to remove all dust.  Sherwin Williams makes a good interior/exterior paint called Solo, which would work great for you.  I know that Solo claims to be, “self-priming”, and you could certainly try to skip the primer and just use several coats of Solo, but you specifically stated you want your job done well, and in my opinion, Solo hasn’t been on the market long enough to prove to me that primer isn’t necessary.  Here’s the product.

    Hopefully, you’re project will be a great success.  I tried to suggest products which are easy to work with for a DIY’er.  Both the primer & paint are a bit pricey, but don’t skimp on the product.  It’s a small portion of the cost of each job, so use the best products you can to insure optimum results.  Good luck!

    Troy Stevens, Stelzer Painting Inc.

  • Re-Painting Exterior Door Trim

    Re-Painting Exterior Door Trim

    QUESTION: Hi, we have two exterior doors in need of new paint because there are some areas of peeling and chipping. Would like to know what we need to do to prepare it. Do we have to strip all the paint from the frames or just areas that are chipping? We will be painting the entire frames to have a fresh look, but we’re not sure if we need to strip everything. Hoping you can help. Also, the paint color is a dark brown and the frame is wood – but I’m not sure type. If I had to guess it would be pine.

    ANSWER: Below is a list of the steps to take in order to prepare the door and surface properly.  They are in order, so just start at #1 and work your way down the list.  Any good painter will tell you that a quality paint-job must begin with excellent preparation, so take your time on these and do them to the best of your ability, and it will pay off in the end!

    1.  Dust or sweep the door and frame to remove loose dirt and debris.  Wipe the door down afterwards with a semi-damp cloth.  A quick cleaning of these surfaces is done at this point, (before the sanding), to prevent you from sanding the dirt & grime into the surface of the door, which could cause deep scratches.

    2.  Scrape the loose paint off the door frame.  Since I don’t have much of a visual of the door, I’m assuming the paint on the door is fairly in tact, but if there’s loose paint, scrape it also.  Don’t put too much pressure on the scraper because you don’t want to gouge the wood.

    3.  After the loose paint is scraped, use a medium-grit sanding sponge to sand the frame first.  If you haven’t ever used a sanding sponge before, they usually come in 3 grits:  Light, Medium and Heavy.  They’re perfect for this job, since they are rigid enough to sand corners thoroughly, but flexible enough to contour and bend to the curves of the wood.  I’d get at least 2 sponges.  The frames require the most sanding, so you’ll want to use the new sponges on the frames.  Once the frames are sanded, sand the doors with the slightly-worn sponges.  Most DIY’ers aren’t clear on how much to sand or to what extent, so I’ll be clear:  You should sand the frames to where there is no gloss or sheen left from the existing paint and the edges of the parts where the raw wood meets the paint should be feathered smooth enough to NOT be able to chip away any more paint with your finger.

    4.  Once the door and frame are sanded thoroughly, dust them off and wipe them down with a clean dry rag.  Avoid water at this point, since you’ll probably have exposed raw wood on the frame.

    5.  Do all necessary masking, (frame, ground, perimeter, hardware, glass, etc.).

    6.  Caulk the frame’s seams and joints using a paint-able caulk.  Follow instructions on the caulk tube as far as dry-time before painting.

    7.  Either use a primer over the raw wood areas or use a finish coat that’s a primer & paint in-one.

    That’s it!  Now you’re ready for paint.  I may sound like a broken record, but please take your time with the prep.  95% of homeowners/DIY’ers end up having problems with the quality or longevity of their paint-jobs due to being in a big rush to start painting.  Although painting is the fun part, it’s about 20% of the total work.  The other 80% is the prep & clean-up.  Happy prepping!

    Troy Stevens, Stelzer Painting Inc.

  • Painting Bathroom

    Painting Bathroom

    QUESTION: We are planning on repainting our main bathroom – but before we do, we have a couple of concerns. The existing painting was done prior to our buying the house and we are not sure what type of paint was used. It appears to be semi-gloss and has a tendency to “blister” when it gets steamy in the room. Small bubbles around the size of a dime or quarter. Is there anything we need to do prior to painting over this? It also has developed mildew which we keep cleaned off, so do we need to do anything about that as well?

    ANSWER: This question is difficult to answer, since neither of us will know why those bubbles & blisters keep coming back until you find the initial source of the problem.  The steam from the bathroom is just a catalyst, but you have bigger problems.  Bubbles & blisters are caused when excess moisture tries to vent from a surface, (in your case, a wall).  When the moisture cannot escape naturally, or when you have an ongoing problem which is making the moisture worse behind the wall with nowhere to escape, it picks the path of least resistance, and that’s when you get the bubbles & blisters.

    Before you even consider painting, I’d strongly suggest you or a plumber check for leaks anywhere close to the bathroom.  If the bubbles & blisters are forming closer to the ceiling than the floor, check above your bathroom, rather than below.  You need to find where that moisture is coming from.  A normal bathroom can handle steam without the paint on the walls blistering, so, again, the steam is not the problem.  Do you have a bathroom exhaust fan?  Does that fan exhaust pipe run all of the way outside the home and not in the attic?  Is that exhaust pipe, fan & baffle in-tact and working correctly?  If you don’t have one, get one.  If you already see mildew, there’s a good chance you could have mold which can’t always be seen on the surface.

    The best-case scenario is that the previous painter painted right over some raw, un-primed drywall or plaster.  This could cause those bubbles and blisters, and you can find out if this is the case by looking at the surface of the wall when a bubble pops.  What do you see?  Do you see raw sheet-rock or plaster?  If so, you MIGHT be able to fix it by feather-sanding all areas where the bubbles & blisters have formed, prime, then paint.  The problem with this fix is, if you don’t remove all of the paint in the areas where the wall underneath wasn’t primed, then you’ll just get brand new bubbles & blisters that will form next to the areas where you DID fix.

    If you see previous coats of paint when bubbles & blisters pop, then your problem is the more serious issue of trying to determine the source of the moisture intrusion.  If you have a fan, run it before starting the shower.  If you have a window, crack it open after the shower.  If you have neither in your bathroom, use a dehumidifier to minimize the amount of moisture.

    I’m sorry this isn’t just a cut-and-dry answer.  It’d be easier on both of us, but I want to be sure I’m giving you the best advice to insure that your paint-job will last a long time.  Don’t be in a hurry to do the painting.  Remember, a good paint-job starts with great preparation, and the prep usually takes twice as long as painting, so find out what you need to know about your moisture issue first.  It will save time & money in the long-run.  Good luck.

    Troy Stevens, Stelzer Painting Inc.

  • Re-Painting A Deck

    Repainting a Deck

    QUESTION: The paint and primer (both water-based) have been peeling from my deck which is exposed to much heat, sun, and rain. After scraping all remaining paint and replacing rotten boards, I am ready to repaint. Is it better to use an oil-based primer than a water-based primer? If I use an oil-based primer, must I also use an oil-based paint, or can I use a water-based paint? Can you offer any advice to prevent the new paint from peeling? 

    ANSWER: First, let me say that painting a deck or using a solid-color stain on a deck is usually a decision best saved for last resort, (like when you’re trying to do a quick fix to sell the home, or if it isn’t realistic to strip).  No paint or solid stain is going to last very long.  The amount of time it DOES last will depend upon the condition of the deck, adequate ventilation below the decking, the condition of the pre-existing finish, the level of preparation you do, the products you choose, and your ability to apply it per manufacturer’s recommendations, (proper thickness, not in direct sun during application, acceptable humidity & temperature levels, and a moisture content of the wood below 10-12%).

    Now, to address the peeling.  Peeling happens for a few reasons.  Without seeing pics, I can only give my best guess.  If paint is peeling down to another level of paint where that lower level of paint is still in-tact, then the peeling is happening because of a lack of adhesion between the lower coat and the coats which have been applied over-top.  This situation is usually caused from either an incompatibility between the 2 products or, more commonly, a lack of preparation, (insufficient sanding or cleaning).  However, if the deck is peeling down to raw wood, it’s usually because the entire coating system is failing.  This can happen when too many layers have been applied, a deteriorated 1st coat, and/or the sheer design of many deck products do not allow the substrate to breathe properly.

    Oil-vs-latex:  Oils are deeper penetrating and block tannin from bleeding through, (the brown oils in the wood).  The disadvantage of oils is that they become brittle over time, so they’re more apt to cracking.  Because the oils are so good at penetrating the wood fibers, they can seal up the wood so well that they prevent the wood from releasing moisture, which can lead to mildew problems.  Latex allows for better breathing, is much more flexible, but doesn’t penetrate as deep.  If you’re starting to get frustrated, you’re not alone.  I’ve done hundreds and hundreds of decks and I can tell you that there is always a trade-off no matter which product you use.

    Although I usually stay away from painting or solid stains on decks, I CAN say that the few that I’ve done in the last year were done with Superdeck Duckback.  It was originally designed for a marine-grade coating which needed to withstand harsh elements and extreme fluctuations in temperature and moisture.  It’s a water-based elastomeric coating, so it’s extremely flexible, but it breathes much better than the old elastomerics.

    Feel free to follow-up with pics if you’d like any further advice or suggestions.  I hope that I’ve covered nearly everything you’d want to know about what to do for best results.  To sum it up briefly, make sure that you’ve done a thorough job sanding & cleaning the deck first, get the best products available in your area, (since the material cost is minimal in comparison to labor), follow directions on the can, and make sure the wood is good and dry.  Spend an extra $40-$50 to invest in a moisture meter, (Protimeter), to make sure that you don’t end up doing all that work, only to find you painted over wet wood, which will lead to premature failure.

    Good luck and happy painting!

    Troy Stevens, Stelzer Painting Inc.

  • Painting Drywall Ceilings

    Painting Drywall Ceilings

    QUESTION: We are doing some remodeling in the basement of our 50 year old home. We replaced drop ceilings with drywall and painted them with two coats of Kilz oil base primer – they look great.  We told the painter to leave it at that for the ceiling painting. He said that over the years he’s had customers do the same and they have been most satisfied. We Would appreciate your experience and opinion on this decision.

    ANSWER: That’s a good question to ask.  If the surface were exterior versus interior, there’d be no debate, since primer on exterior surfaces will get chalky over time and doesn’t have UV Protection.  Since this is interior however, the answer isn’t so cut-and-dry.  Although you COULD get away with leaving your ceilings primed and NOT applying a top-coat, I wouldn’t recommend it, since a surface which is only primed cannot be cleaned.  A painted interior finish, (especially a quality acrylic paint, will be much more durable and washable, and the higher in sheen you go, the more durable & washable it will be).  If you were to end up ONLY priming, you lose the option of being able to maintain the surface by cleaning, which means you’d have to touch-up each time in the future.  The paint acts as a protective glove.

    If the area is still masked & protected, putting a finish coat of ceiling paint shouldn’t cost near as much as your initial price for having the ceiling primed, since more than half of the work is the prep.  If the painter sprayed the paint versus brush & roll, spraying a final coat of finish takes no time at all.  In my opinion, you’ve come this far, don’t skimp on putting that final coat on.

    I’m sure your painter probably has the best of intentions and is quite likely giving you what he believes to be a practical and affordable solution.  I believe him when he said that he’s done this many times and has had good results.  If, however, he were to live in one of these homes that had only been primed, I’m pretty sure he would understand that merely priming the ceiling is more of a short-term solution.  If he insists, I’d challenge him to furnish you with contact info from past customers with whom he has done this for so that you might gain first-hand knowledge of the advantages vs. disadvantages.

    Good luck!

    Troy Stevens, Stelzer Painting Inc.
VIEW OUR RECENT PROJECTS

WHY CHOOSE US

We have been providing top quality exterior and interior painting for homes and businesses in the Portland & Vancouver-Metro Areas since 1998. In addition to standard interior and exterior painting, Stelzer Painting specializes in staining, sealing, power washing, faux finishes, wallpaper removal, popcorn ceiling removal, and various textures for walls and ceilings. With over 25 years of professional painting experience, Stelzer painting will provide you with the very best painting service at unbeatable rates.

STELZER PAINTING IN A NUTSHELL

  • Residential & Commercial Painting Services
  • 25+ Years of Professional Painting Experience
  • Premium Paint Products
  • Extended Warranties
  • 100% Satisfaction Guaranteed
Created by The Gorilla Agency